
I’m going to dive right into this blog post on creating a plugin for WordPress. There are countless tutorials out there and ways to code and structure a plugin, but for the purposes of these articles I’m going to make it short and simple.
To start off with, you’ll need to know a bit about WordPress – it’s a very capable content management system with tons of extensible options and countless thousands of paid and free plugins. Plugins are really very simple and are broken down into three main components:
- The information header that describes the plugin and details about the author
- The user defined functions that run when the plugin is triggered
- The add_action() and/or add_filter() functions that connect it to WordPress
For an extremely simple plugin, lets look a basic one that uses a WordPress action and stores a simple variable that can be sent as an output to the template.
Connect via FTP to your website, browse to /wp-content/plugins and create a folder inside your WordPress plugins folder called “test”. Inside the test folder, create a blank file called “test.php” and insert the following lines of code into it:
<?php

/**
* Plugin Name: Test plugin
* Plugin URI: http://www.mainwp.com
* Description: This plugin does some stuff with WordPress
* Version: 1.0.0
* Author: Your Name Here
* Author URI: http://www.mainwp.com
* License: GPL2
*/

?>
This is the information header – it’s required in order for WordPress to properly display the plugin and for WordPress to recognize it. Once you’ve done this you have officially created your first plugin that does absolutely nothing! Now you just need to activate it inside the plugins section in your admin dashboard, and we can continue.

So here is where things get interesting – we want to perform an action within WordPress using a user defined function (which means you are creating your own function and calling it). The WordPress Codex has a full reference for Plugin actions here: https://codex.wordpress.org/Plugin_API/Action_Reference
Let’s select the wp_footer action and write some text on the page at the end of the footer, just as a starting point, then we can work on storing that variable and adding a menu option to change that variable.
Add the following lines beneath the information header, and save your test.php file again. The first line uses the WordPress hook add_action, and the action used is wp_footer, which is triggered just before the </body> section of the template. It’s calling the function “my_function”, which you created just below the action.
add_action( 'wp_footer', 'my_function' );

function my_function() {
    echo 'hello world';
}
Once you save the file browse to your site’s URL and you should see something at the very bottom of your page:

Congratulations! Your first plugin that does something to WordPress using an action is a great place to start.
Next, we want to create a menu option and change this over to a variable rather than just “hello world”. It will let you write whatever you want to the footer of your template, and change it via a textbox.
Add the following code to your test.php file, and once again, save it.
add_action('admin_menu', 'my_admin_menu');
function my_admin_menu () {
add_management_page('Footer Text', 'Footer Text', 'manage_options', __FILE__, 'footer_text_admin_page');
}
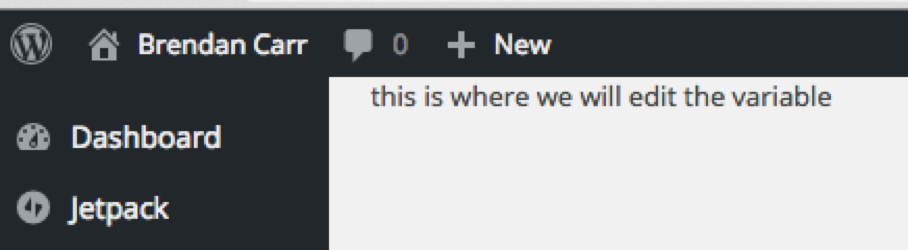
function footer_text_admin_page () {
echo 'this is where we will edit the variable';
}
In a nutshell, this is calling another WordPress action called “admin_menu”, and running the function “my_admin_menu”. Inside the function “my_admin_menu” we are adding a management page, and calling another function when you visit that management page. The breakdown of the add_management_page function is below, and more information about it can be found here: https://codex.wordpress.org/Function_Reference/add_management_page
add_management_page( $page_title, $menu_title, $capability, $menu_slug, $function );
Once you refresh your admin dashboard after saving the file, you’ll notice that in the Tools menu there is an option called “Footer Text”.
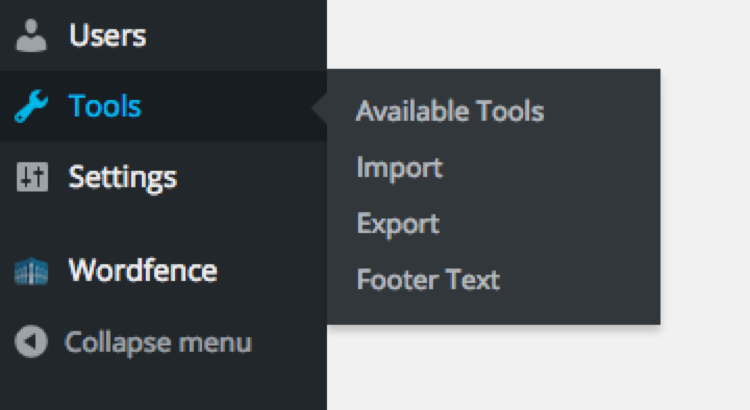
When you go to that page, it will call the function we just created, and you’ll end up with the following:
Great! We’re more than halfway there. Let’s add a small form to it and change the function “my_function” to a variable instead of a fixed string. The function my_function will look like this now:
function my_function() {
    $textvar = get_option('test_plugin_variable', 'hello world');
    echo $textvar;
}
All this does is output the stored option ‘test_plugin_variable’ if it’s available (if it has been changed and saved), and ‘hello world’ if it’s not.
The footer_text_admin function will change to the following, which will create a simple form to update the variable, and a hook to update the variable if the form is submitted:
function footer_text_admin_page () {
    $textvar = get_option('test_plugin_variable', 'hello world');
    if ( isset($_POST['change-clicked']) ) {
        update_option( 'test_plugin_variable', $_POST['footertext'] );
        $textvar = get_option('test_plugin_variable', 'hello world');
    }

?>

<div class="wrap">

<h1>Footer Text</h1>

<p>This simple plugin will output some text to the footer of your template. Change the text below:</p>

<form action="<?php echo str_replace('%7E', '~', $_SERVER['REQUEST_URI']); ?>" method="post">
Footer Text:<input type="text" value="<?php echo $textvar; ?>" name="footertext" placeholder="hello world"><br />
<input name="change-clicked" type="hidden" value="1" />
<input type="submit" value="Change Text" />
</form>
</div>

<?

}
Once you save everything, you’ll see this on your admin dashboard:
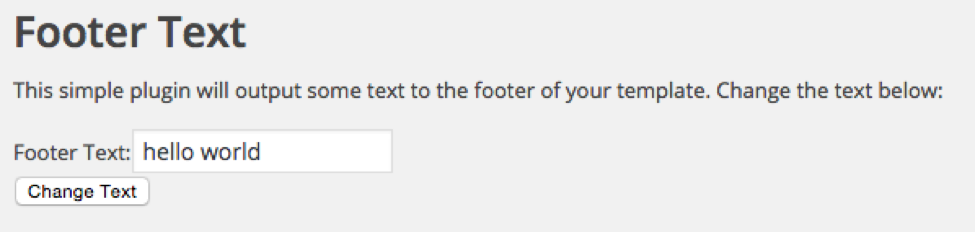
As soon as you’re done changing it, it will automatically update the text that is output on the site too.

There you have it! A few quick and easy methods for accessing and storing variables in WordPress, adding a menu option, and using WordPress actions to perform your user defined functions. In the next post we will connect your plugin to MainWP and show you how to move everything over so that it lets you manage everything from within MainWP itself. Thanks for reading!